I was frustrated that video conferencing applications such as Google Meet and Zoom give the user very limited control over their video stream. As a workaround, it is possible to create a “loopback” video device which appears to these video conferencing applications as a normal webcam but whose video content is synthesized by a different application – hence the name “webcam spoofing”.
The video stream for the loopback device can be generated by a
command-line invocation of ffmpeg, but a much nicer option is to use
Open Broadcaster Software, or OBS. It
provides an excellent user interface for combining different video
sources into the output stream, and it is particularly optimized for
making real-time adjustments to the configuration.
Similarly, a virtual PulseAudio source can be created which combines the audio from multiple input devices and system sources and appears to applications as a normal microphone. This can be done independently from webcam spoofing, but for a more polished experience, OBS can also be used to control the mixing of audio streams into the virtual microphone.
These instructions are for Linux systems only. I have used this arrangement successfully on Arch Linux and Ubuntu 18.04.
Initial setup
Initial setup is pretty simple, requiring no more than the installation of a few packages. On Arch, two packages come from the AUR and the rest come from the repositories. On Ubuntu, one small package must be built from source and the rest come from the repositories.
Dependencies for video
- OBS is packaged as
obs-studiofor Arch and Ubuntu. - We need
v4l2loopback-dkmsfor creating the virtual webcam device. - The
v4l-utilspackage providesv4l2-ctl, which can be useful for listing and inspecting video devices. - Finally, we need the
obs-v4l2-sinkconnector to enable OBS output into the virtual webcam. It is available from the Arch User Repository, or can be installed from source on Ubuntu following the instructions.
Dependencies for audio
- We need the
pactlcommand (packaged withlibpulseon Arch orpulseaudio-utilson Ubuntu). pavucontrolcan be helpful for inspecting or modifying the audio routing created by OBS.
Device setup
The virtual webcam and microphone do not persist across reboots, so the following steps must be repeated each time.
Video device creation
Run as root:
modprobe v4l2loopback exclusive_caps=1 video_nr=9
The exclusive_caps=1 parameter forces the loopback device to
advertise itself as a camera instead of as a loopback
device. Otherwise, certain video conferencing applications will
helpfully ignore it.
The video_nr=9 parameter forces the loopback device to show up as
/dev/video9, so that it doesn’t get interleaved with webcams (which
are numbered in the order in which they are attached).
Audio device creation
Run as user:
pactl load-module module-null-sink sink_name=OBS
pactl load-module module-virtual-source source_name=FakeMic master=OBS.monitor
The first command sets up a “null sink”, i.e. a virtual output device, to collect the audio output from OBS. (The name is arbitrary; you can call it something other than “OBS” if you prefer.)
The second command sets up a “virtual source”, i.e. a fake microphone, and connects it to the monitor channel of the null sink.
OBS setup
Lastly, we need to change a few settings in OBS.
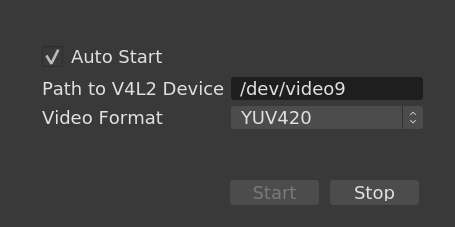
Under “Tools -> V4L2 Video Output”: enable Auto Start, set the v4l2
device to /dev/video9, and click “Start”.
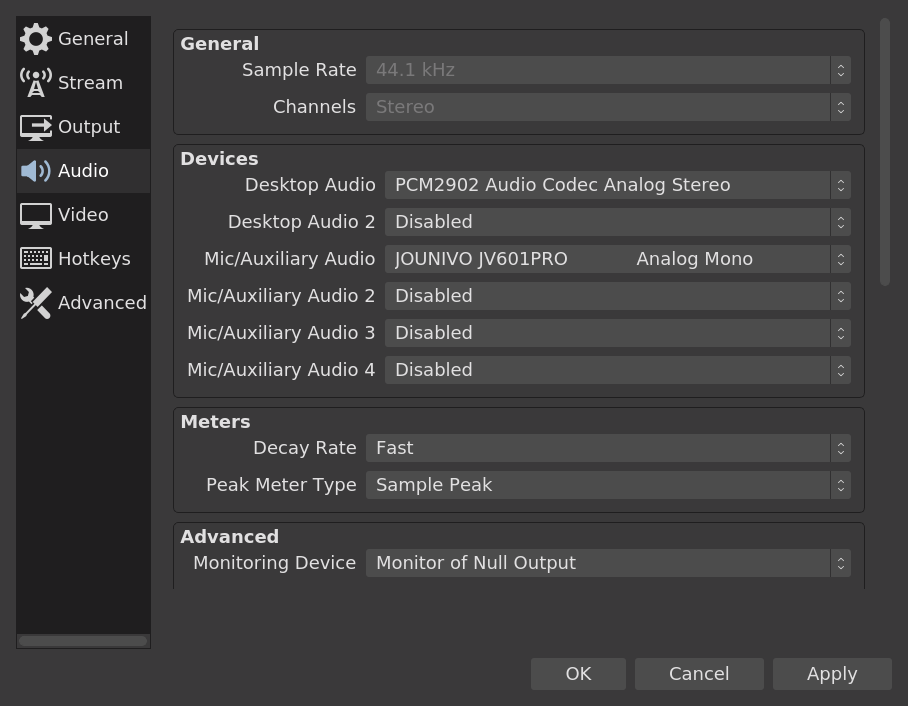
Under “Settings -> Audio”: set the Monitoring Device to “Monitor of Null Output”.
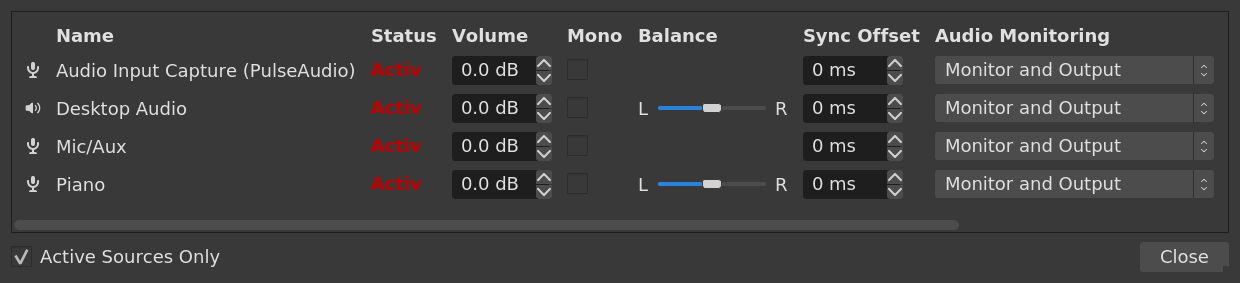
Under “Advanced Audio Properties”, enable the monitor output for all audio sources.
Go ahead add your webcam sources (or screen shares, or whatever you want to stream) to the OBS canvas. If you need additional audio sources beyond the default “Desktop Audio” and “Mic/Aux” channels, go ahead and add those as well.
In your videoconferencing application, you should now be able to select “Dummy video device” as the video source and “Virtual Source FakeMic” as the audio source.
Using OBS
OBS is mostly self-explanatory once you poke around a little bit. With studio mode, you can make changes to the video layout on a separate “working canvas” and fade in the changes once you are satisfied with the layout and appearance.
If webcam images are choppy, try opening the capture device properties and changing its video format to one of the options marked “emulated”. This permits the webcam to communicate with the kernel driver in its preferred compressed format (typically MJPEG) instead of forcing it to stream data in the much-higher-bandwidth raw format which is natively consumed by OBS.
If you are as impressed as I was by the quality of OBS, go ahead and make a donation to support its ongoing development.